ArUco marker detection
The following applies to image versions 0.22 and up. Older documentation is still available for for version 0.20.
Marker detection requires the camera module to be correctly plugged in and configured.
aruco_detect module detects ArUco markers and publishes their positions in ROS topics and as TF frames.
This is useful in conjunction with other positioning systems, such as GPS, Optical Flow, PX4Flow, visual odometry, ultrasonic (Marvelmind) or UWB-based (Pozyx) localization.
Using this module along with map-based navigation is also possible.
Setup
Set the aruco argument in ~/catkin_ws/src/clover/clover/launch/clover.launch to true:
<arg name="aruco" default="true"/>
For enabling detection set the aruco_detect argument in ~/catkin_ws/src/clover/clover/launch/aruco.launch to true:
<arg name="aruco_detect" default="true"/>
For the module to work correctly the following arguments should also be set:
<arg name="placement" default="floor"/> <!-- markers' placement, explained below  -->
<arg name="length" default="0.33"/>     <!-- length of a single marker, in meters (excluding the white border) -->
placement argument should be set to:
floorif all markers are on the ground;ceilingif all markers are on the ceiling;- an empty string otherwise.
You may specify length for each marker individually by using the length_override parameter of the node aruco_detect:
<param name="length_override/3" value="0.1"/>    <!-- marker with id=3 has a side of 0.1m -->
<param name="length_override/17" value="0.25"/>  <!-- marker with id=17 has a side of 0.25m -->
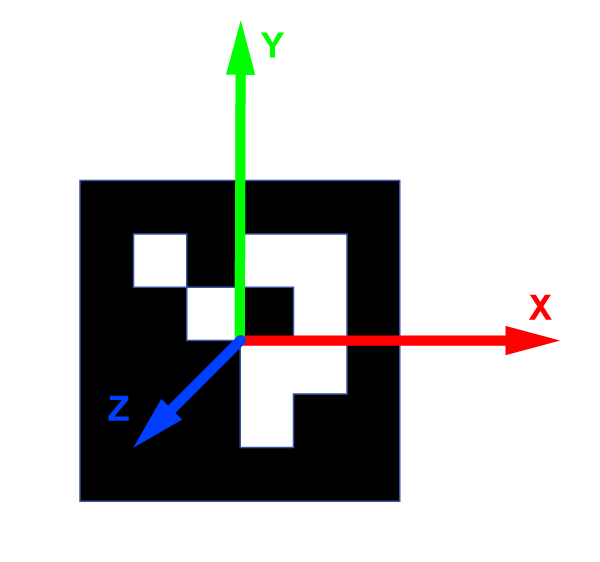
Coordinate system
Each marker has its own coordinate systems. It is aligned as follows:
- the x axis points to the right side of the marker;
- the y axis points to the top side of the marker;
- the z axis points outwards from the plane of the marker
Working with detected markers
Navigation within the marker-based TF frames is possible with simple_offboard node.
Sample code to fly to a point 1 metre above marker with id 5:
navigate(frame_id='aruco_5', x=0, y=0, z=1)
Sample code to fly to a point 1 metre to the left and 2 metres above marker with id 7:
navigate(frame_id='aruco_7', x=-1, y=0, z=2)
Note that if the required marker isn't detected for 0.5 seconds after the navigate command, the command will be ignored.
These frames may also be used in other services that accept TF frames (like get_telemetry). The following code will get the drone's position relative to the marker with id 3:
telem = get_telemetry(frame_id='aruco_3')
Note that if the required marker isn't detected for 0.5 seconds, the telem.x, telem.y, telem.z, telem.yaw fields will contain NaN.
Handling marker detection in Python
The following snippet shows how to read the aruco_detect/markers topic in Python:
import rospy
from aruco_pose.msg import MarkerArray
rospy.init_node('my_node')

# ...

def markers_callback(msg):
    print('Detected markers:'):
    for marker in msg.markers:
        print('Marker: %s' % marker)

# Create a Subscription object. Each time a message is posted in aruco_detect/markers, the markers_callback function is called with this message as its argument.
rospy.Subscriber('aruco_detect/markers', MarkerArray, markers_callback)

# ...

rospy.spin()
Each message contains the marker ID, its corner points on the image and its position relative to the camera.
Suggested reading: map-based navigation