Installation of FPV
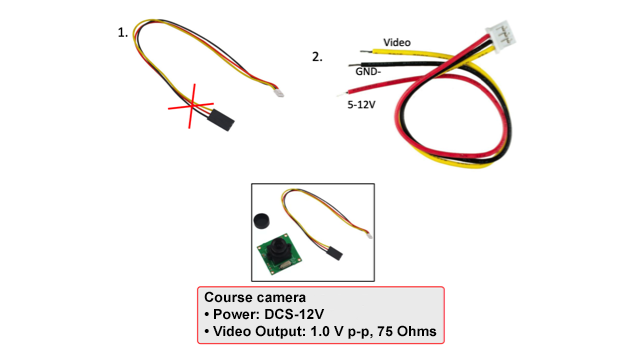
Preparation of the FPV camera
- Take the connector wire from the camera and cut off the BLACK side of the 3-pin connector.
- Prepare the wire leads to be connected:
- Shorten the wires to the desired length *.
- Strip (remove 2 mm of insulation from the end of the wire without damaging the strands).
- Twist the wires.
- Blanch using tweezers.
* The distance between the power distribution board and the estimated location of the camera should be determined in advance!
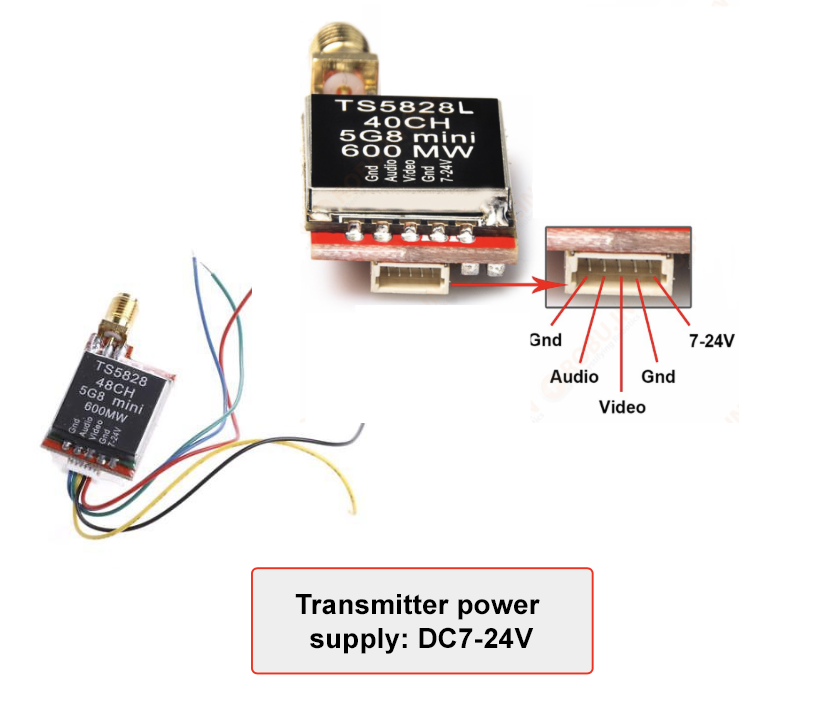
Preparation of the transmitter
The same procedure applies here:
- Take the connector wire from the transmitter and cut off the BLACK side of the 5-pin connector.
- Prepare the wire leads to be connected:
- Shorten the wires to the desired length *.
- Strip (remove 2 mm of insulation from the end of the wire without damaging the strands).
- Twist the wires.
- Blanch using tweezers.
* The distance between the power distribution board and the estimated location of the transmitter should be determined in advance!
Connection of FPV
Prepared connectors are to be inserted into appropriate sockets, and power wires are to be soldered to the power distribution board according to the circuit diagram:
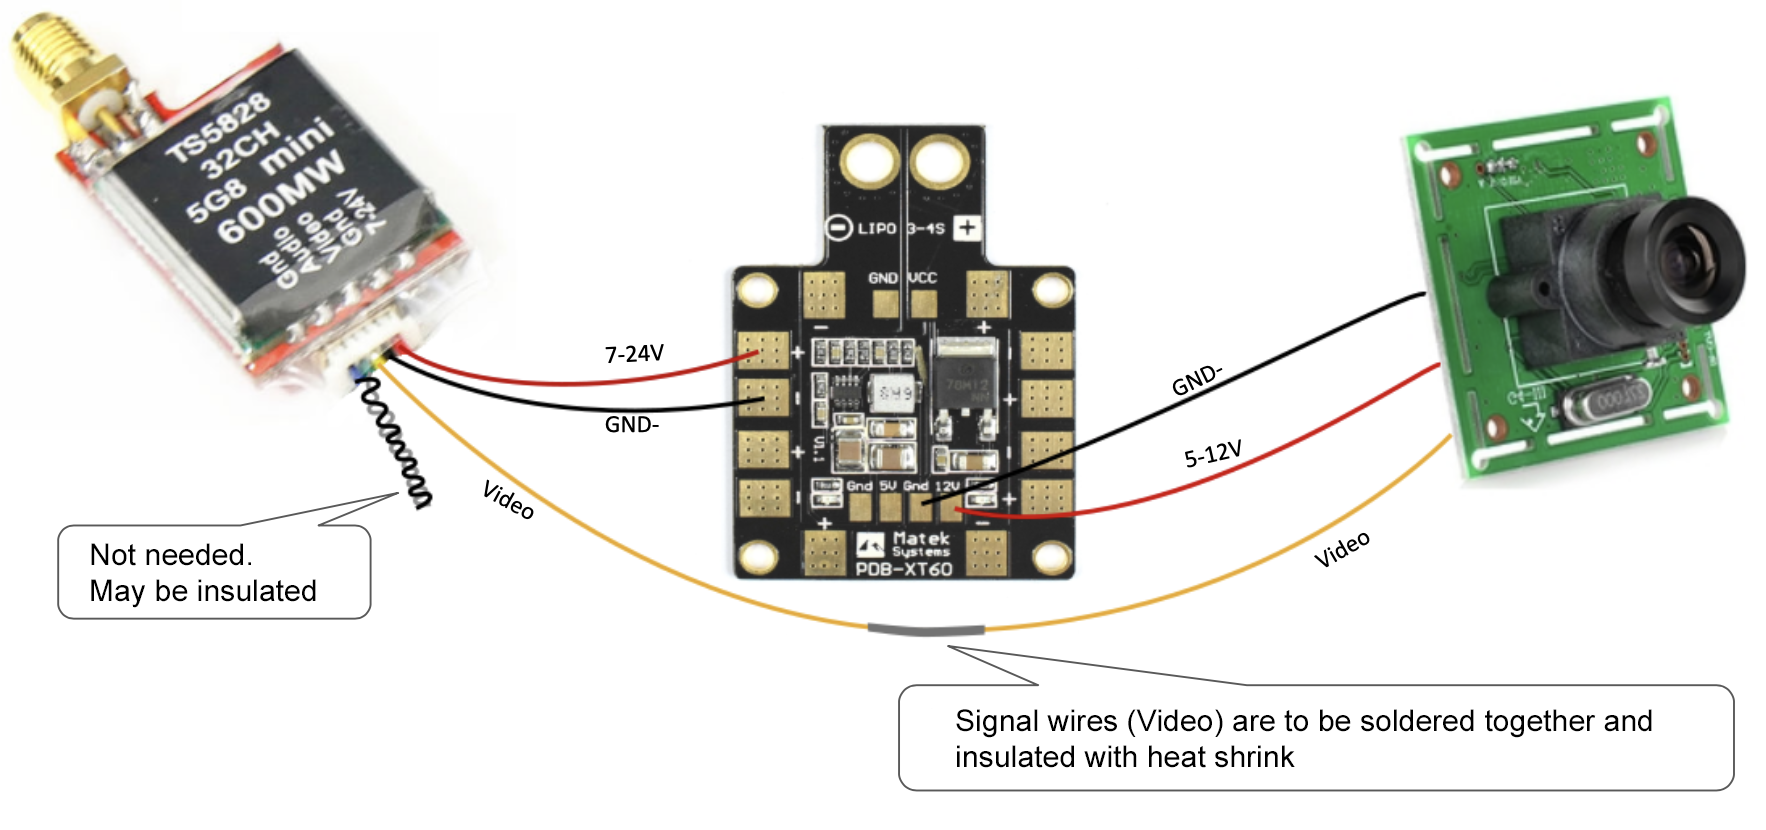
In this circuit diagram, the camera is powered from 12 V (however, it is possible to use 5 V). The transmitter is powered from the ESC power (however, it is possible to use 12 V).
Installing FPV components
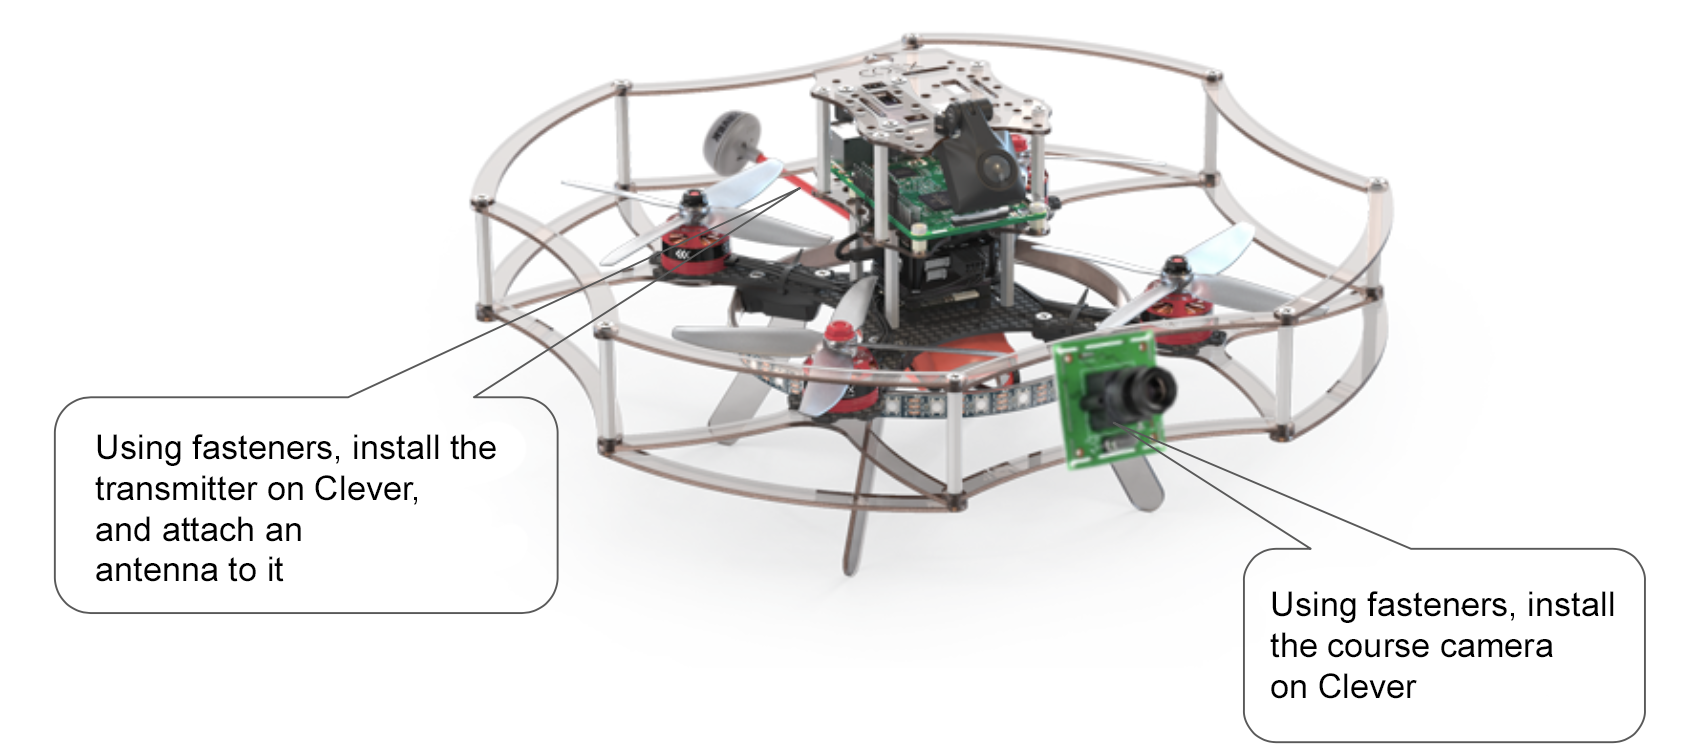
The following may be used as fastening materials:
- Hot-melt glue;
- electrical tape;
- zip-ties (clamps);
- double-sided adhesive tape.