Connecting Raspberry Pi to the flight controller
In order to program autonomous flights, work with Pixhawk or Pixracer over Wi-Fi, use controller app and access other functions you need to connect your Raspberry Pi to the flight controller.
USB connection
USB connection is the preferred way to connect to the flight controller.
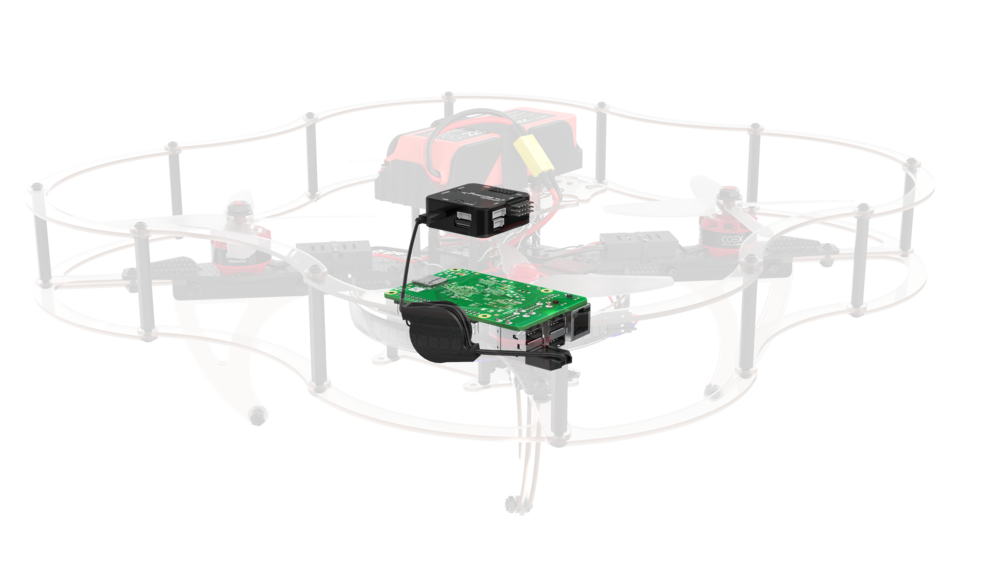
- Connect your FCU to the Raspberry Pi using a microUSB to USB cable.
- Connect to the Raspberry Pi over SSH.
Make sure that the connection is working properly by running the following command on the Raspberry Pi:
rostopic echo /mavros/stateThe
connectedfield should have theTruevalue.
You need to set the
CBRK_USB_CHKparameter to 197848 for the USB connection to work.
UART connection
UART connection is another way for the Raspberry Pi and FCU to communicate.
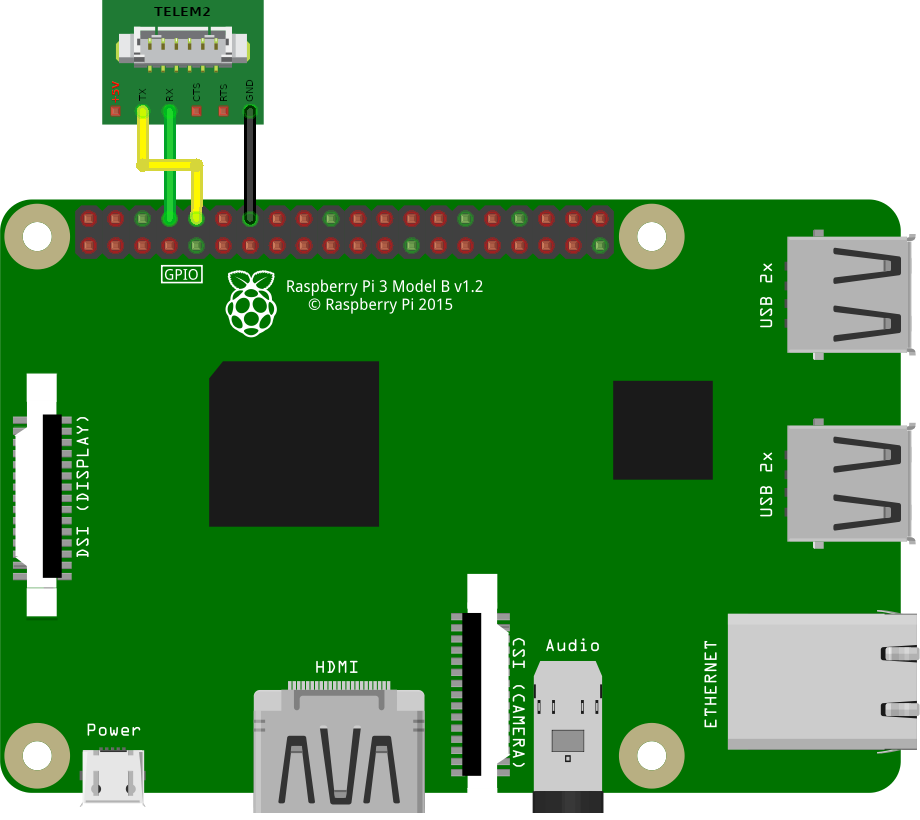
If the pin marked GND is occupied, you can use any other ground pin (look at the pinout for reference).
- Connect the TELEM 2 port on the flight controller using a UART cable to the Raspberry Pi pins following this instruction: the black cable (GND) to Ground, the green cable (UART_RX) to GPIO14, the yellow cable (UART_TX) to GPIO15. Do not connect the red cable (5V).
- In PX4 of version v1.9.0 or higher, set parameter values:
MAV_1_CONFIGto TELEM 2,SER_TEL2_BAUNDto 921600 8N1. In PX4 of version prior to v1.9.0 the parameterSYS_COMPANIONshould be set toCompanion Link (921600 baud, 8N1), to set it correctly use the old version of QGC v3.3.1. - Connect to the Raspberry Pi over SSH.
Check the presence of the parameters
enable_uart=1anddtoverlay=pi 3-disable-btin the file/boot/config.txtby running the following command on the Raspberry Pi:cat /boot/config.txt | grep -E "^enable_uart=.|^dtoverlay=pi3-disable-bt"If the parameters in the file are different or missing, then edit the file and restart the Raspberry Pi.
Change the connection type from
usbtouartin the Clover' launch file~/catkin_ws/src/clover/clover/launch/clover.launch:<arg name="fcu_conn" default="uart"/>If you change the launch file, you need to restart the `clover' service:
sudo systemctl restart cloverMake sure that the connection is working properly by running the following command:
rostopic echo -n1 /mavros/stateThe
connectedfield should have theTruevalue.
Read more in the PX4 docs: https://docs.px4.io/main/en/peripherals/serial_configuration.html.